Now when you know someone since the age of 5, you sometimes get amazed when you start telling people just how much you know about your friend... from her chocolate filled snacks at recess to her fudge ice cream addictions at lunch, to growing up to be the biggest marzipan fanatic I know. Now tell you me how could I possibly deny her, her biggest desires?

Mon amie Cocotte est la plus ancienne amitié que j'ai à ce jour. I don't remember exactly how our friendship started, but throughout all of elementary school we were in the same class. She would often correct my French and I would often envy her lunches. Every lunch time was the same, our group consisted of 5 girls, and we'd all exchange items from our lunch bags or boxes amongst each other. We always fought for the same things: chocolate chip cookies, fruit punch juice boxes, a famous ham sandwich made by M.E's mother with extra mustard (that was one of my favorites)... Even now, I can't seem to stop asking anyone I'm dining with what they have for lunch, hihihi.

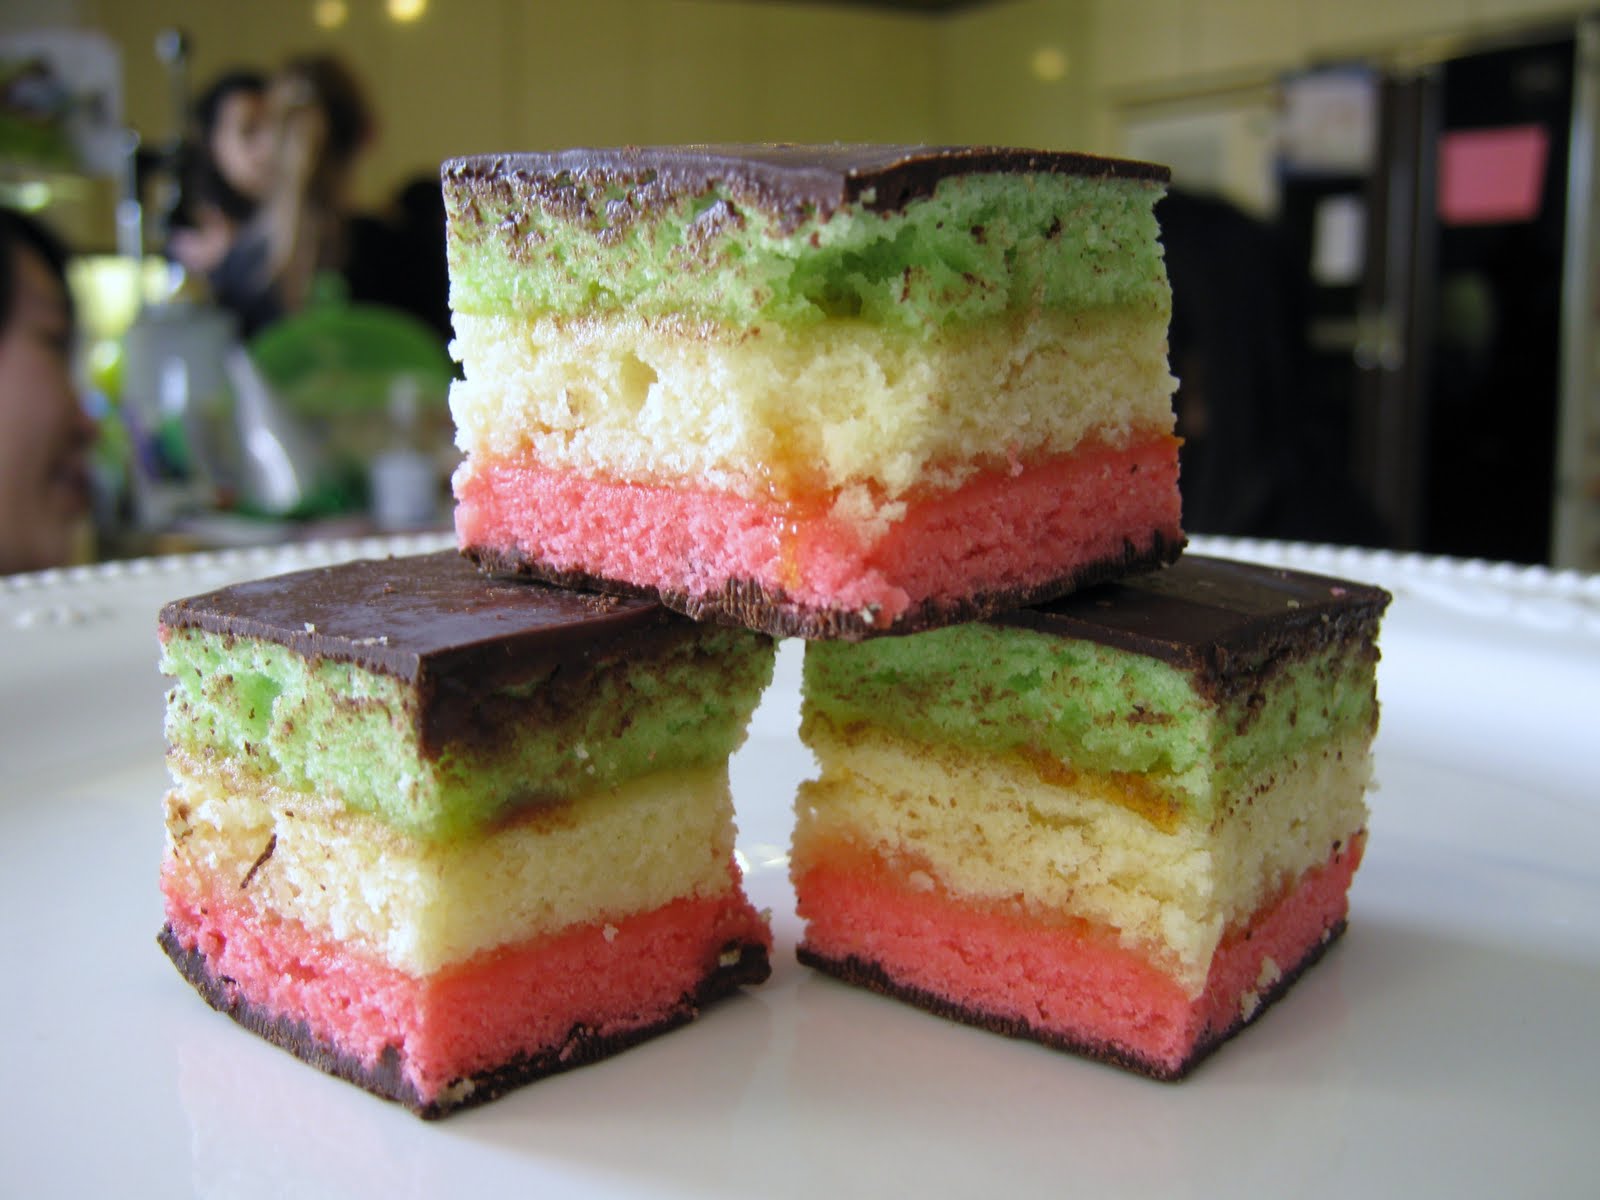
Back to Cocotte's birthday present, well needless to say it was a box full of these tri-color little cakes. They're actually like petits-fours, each marzipan based layer baked until just set, stuck together with apricot jam and covered on both ends with a dark chocolate glaze. I knew this would be ideal for the birthday gal the moment I'd seen it on Smitten Kitchen. For months I'd been awaiting her birthday so I could gift it to her and the opportunity finally arrived! Reading through the recipe for the nth time (yes I am very thorough with my preparation which requires re-reading recipes and the instructions until properly memorized, or almost), I was worried about the time factor. According to Deb at SK, this cuillère à sucre requires 11 hours, which I didn't have considering I had my last 2 finals the day before the big event. Top it off, I had no marzipan or almond paste at home! So I awoke Thursday morning in a hurry to go purchase the necessary ingredients and by 9h30 that morning, I was elbow deep in sugar... well almost!

Now the smart thing to have done was to start by making the recipe that requires the most amount of time... right? Well intelligent me decided to start off with the birthday cake I was responsible to make for her potluck style gathering (don't be angry, but I kind of forgot to snap some shots). While I had my pans baking in the oven for that chocolate birthday cake, I began prepping for the 7 layer cookies. Now this recipe calls for a heavy duty machine (like a fancy red and silver 475 Watts Kitchenaid stand mixer), which I received as my very own birthday gift the night before! Yet again, the very smart I decided not to open it just yet! So there I was with my little hand mixer trying for the life of me to combine sugar and marzipan together. Believe me, it wasn't an easy task! Rushed in time, and working with machinery which was about to give up on me after all the hard work I made it do, the combined efforts of my little hand mixer and I were well worth it. As Cocotte slowly opened the lid of the box, the skin around her eyes crinkled as her lips widened into a big smile and her eyes twinkled like shining stars.

Bonne fête Cocotte, que tous tes voeux se réalisent et que tu demeures pour toujours ma plus ancienne amie!
7 Layer Cookies
Adapted from Smitten Kitchen
Ingredients:
- 1 cup sugar
- 1 1/4 tube marzipan
- 2 1/2 sticks (1 1/4 cups) unsalted butter, softened
- 1 teaspoon almond extract
- 4 large eggs, separated
- 2 cups all-purpose flour
- 1/2 teaspoon salt
- 20 drops red food coloring
- 20 drops green food coloring
- 1 (12-oz) jar apricot preserves, heated and strained
- 7 oz fine-quality bittersweet chocolate (not unsweetened), chopped
- 2 teaspoon canola or vegetable oil, divded
- Using a mixer (preferably a stand mixer), combine the almond paste and 3/4 cup sugar, until well blended (about 3 minutes). Beat in the butter until pale and fluffy and no apparent pieces of the almond paste are visible (another 3 minutes). To be honest, if you are attempting to do this without a standmixer, it will take longer, and I still had almond paste lumps in my batter. Add yolks, I added mine one at a time out of habit, and almond extract and beat until well combined (2 minutes). At low speed, beat in the flour and the salt until just combined.
- In another bowl, whisk the eggwhites until they hold soft peaks. Add 1/4 cup of the sugar gradually while beating on high, until your whites hold stiff and glossy peaks. Fold in half of the eggwhites into your almond batter until well combined, and fold in the remaning whites softly.
- You can now preheat your oven (or that of your friend's if that's where you're baking) to 350'F.
- Divide your batter in 3 equal parts and color 2 of them with about 20 drops of the color of your choice. I did red and green as per the original recipe, but I just might redo this with blue and yellow next time. When mixing in the colors, do so softly in order to keep the batter as light as possible.
- Line 3 9x13 pans with parchment paper and spray oil or butter it properly. If in case you don't own 3 such pans (who does anyways?), just chill the batter while one batch bakes, let cool, clean pan and line again. Spread the batter evenly in the pan with a spatula (offset works best, but I don't own one) until properly spread. The batter should be about 1/4 inch thick. Bake for 8-9 minutes. Repeat process until all 3 layers have been baked and cooled.
- Once all my layers were cooled, I did alot of cheating, for one, I brushed very strictly the very little amount of apricot jam I had left in the fridge (I kind of forgot to make a proper grocery list at 8 am when I awoke in a panic for the lack of ingredients I had). To do so, invert the layer you desire to be at the bottom first onto another clean piece of parchment paper, and remove the existing lining paper from its bottom. Add a thin layer of jam and invert second layer onto the first in the same fashion. Apply thin layer of jam yet again and invert the last layer of cake in the same fashion. Align properly and wrap it all up in celophane.
- Then instead of letting the whole thing chill for 8 hours, I might have put it in the freezer for 3 hours... When you want it to chill, you want to add a little bit of weight to make sure all the layers will stick well together. Your baking pan is ideal for that, so just dump it on top while it chills.
- After the chilling process, let the cookies cool down to room temp.Using a sharp serated knife, trim all four sides of the cookies. In a double boiler, melt half of the chocolate with just half the oil. Remove the wrap from the cookies and quickly spread the chocolate over one side of the cookies equally. Place cookies in the freezer for about 10 minutes. While the chocolate firms up, melt the remaining chocolate and oil again. Place a piece of parchment paper on the chocolate covered side and flip cake. Spread the melted chocolate over this side of the cake and let chill for another 10 minutes.
- To cut the cookies, use a very sharp serated knife, keep hot water and a clean dry towel close by. Dip your knife in the hot water and dry it quickly, while your knife is still hot, cut through the cookie. Clean, dip and dry your knife between every cut.
Voilà, now the only thing left to do is find a Cocotte just like mine and make them very happy! (Or you could just keep them all to yourself).
.JPG)
No comments:
Post a Comment